
Looking back to the magic N-track train I was searching for something bigger but using the same firmware with advanced features. I decided to keep the ClickBeetle standard to add more boards offering to possibility to build a flexible HMI.


The base board called HmiBeetle is capable to add up to 5 ClickBeetle boards as THT or SMT at the front and 5 ClickBeetle boards as THT or SMT at the back. Several display boards of Waveshare can be plugged in. If used with InverterBeetle of magic N-track train, the high power outputs can be connected to green terminal stripes. An USB port offers an FTDI UART to serial bridge. A 10-pin debug connector offers SWD. Powering is done via USB or DC power jack.
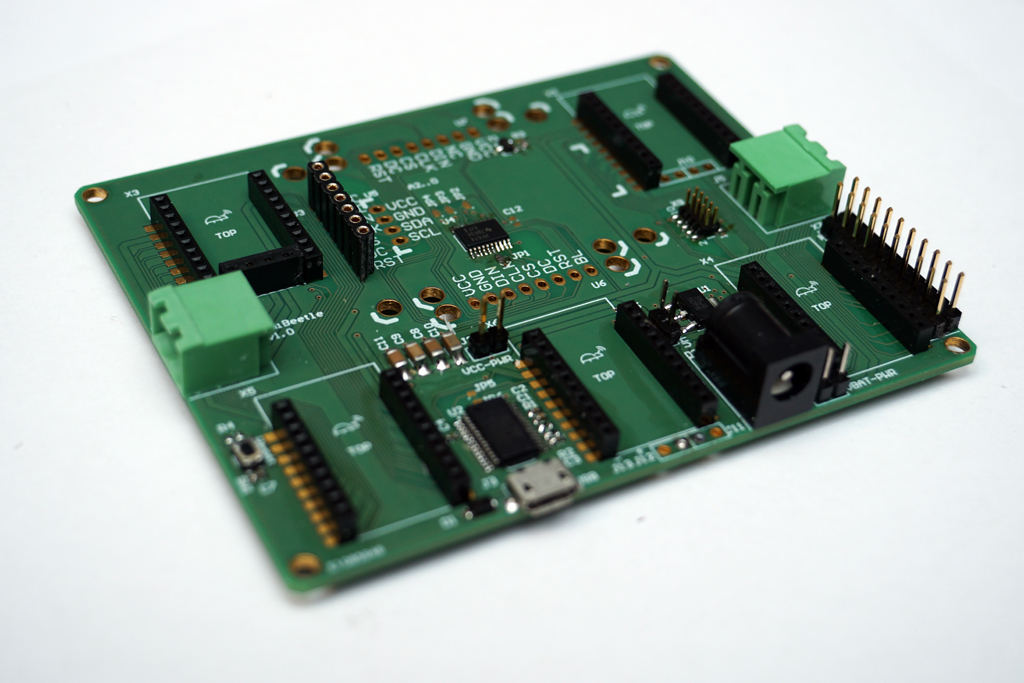
HmiBeetle
For building a train controller based on ClickBeetle boards, following boards were used or designed:
Fujitsu Electronic Europe’s BlueBeetle1 which can be ordered via FEEU’s Webshop
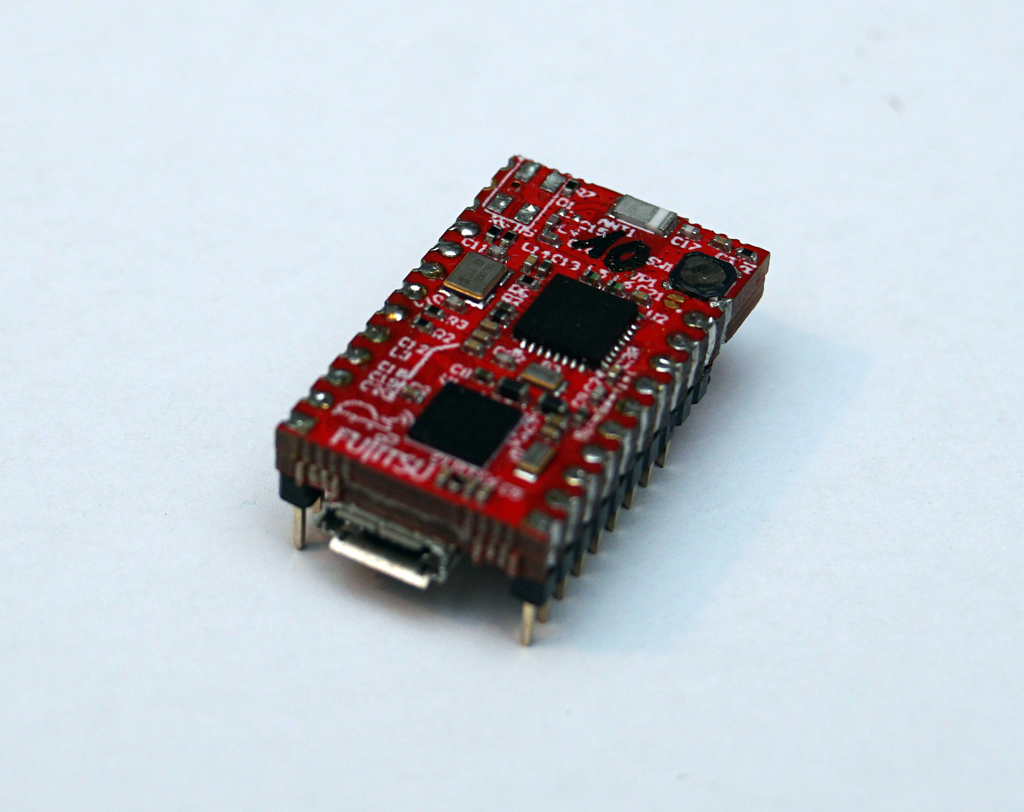
FEEUs BlueBeetle1
For the current version of the ClickBeetle model train controller a 1.54″ OLED RGB display was used. It can be found at the Waveshare website.
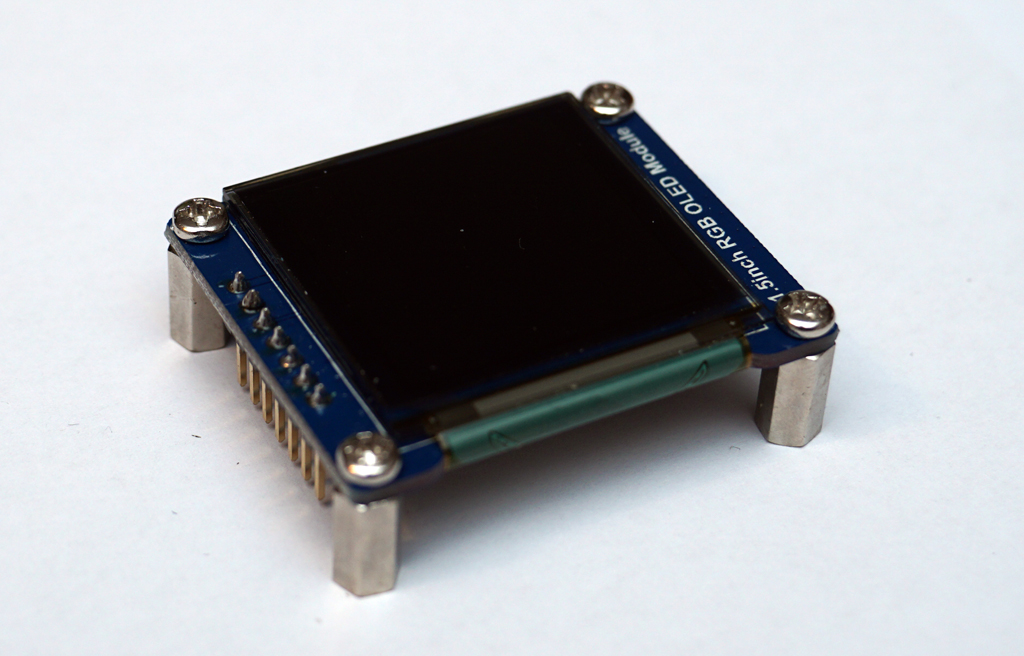
1.54″ OLED RGB display
For controlling the display RBG rotary encoders were used. Since ClickBeetle is limited with GPIOs, the rotary encoders were put together with a PCF8574 port expander. All together builds up the EncoderBeetle which was newly designed for this project.
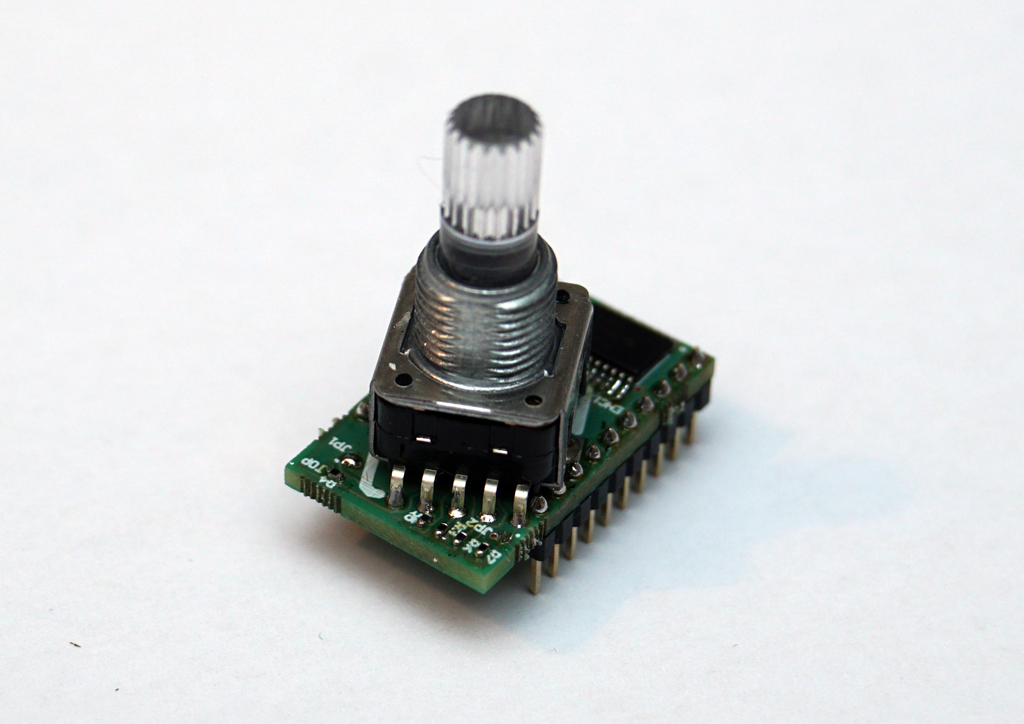
RotaryBeetle
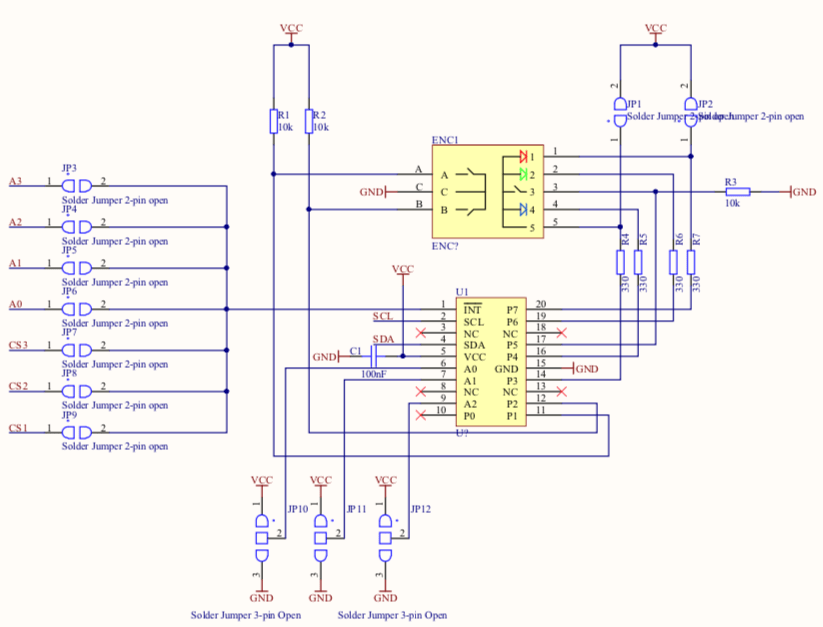
Schematic RotaryBeetle
The power stage is the same also used in the magic N-track train project was designed for these kinds of projects and is called InverterBeetle.
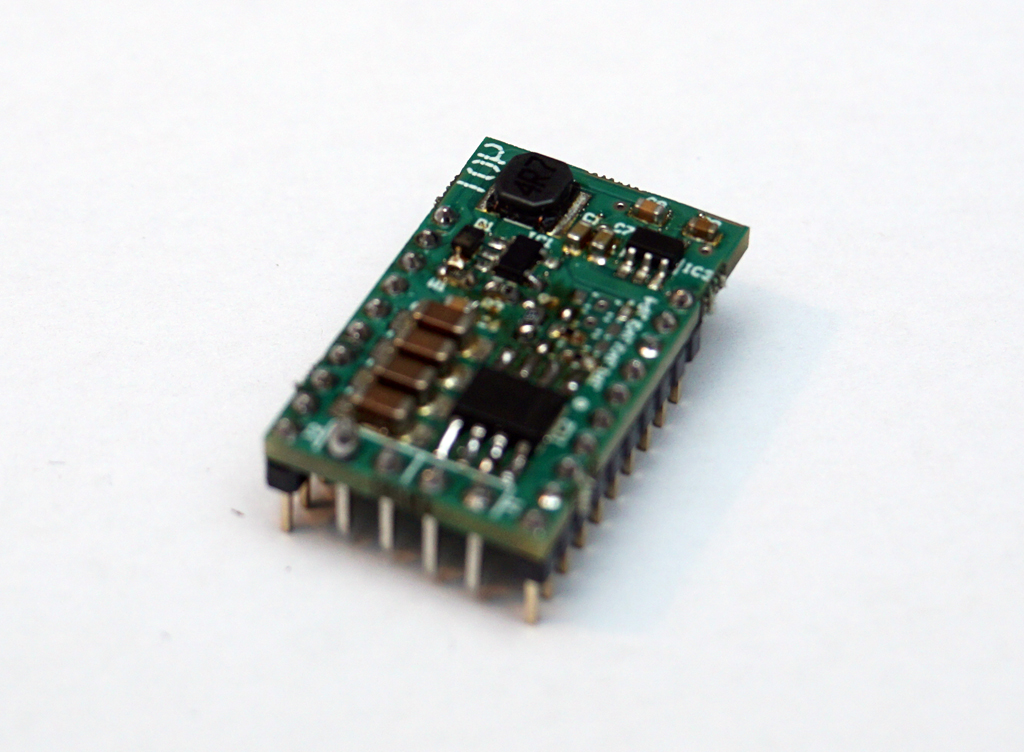
InverterBeetle
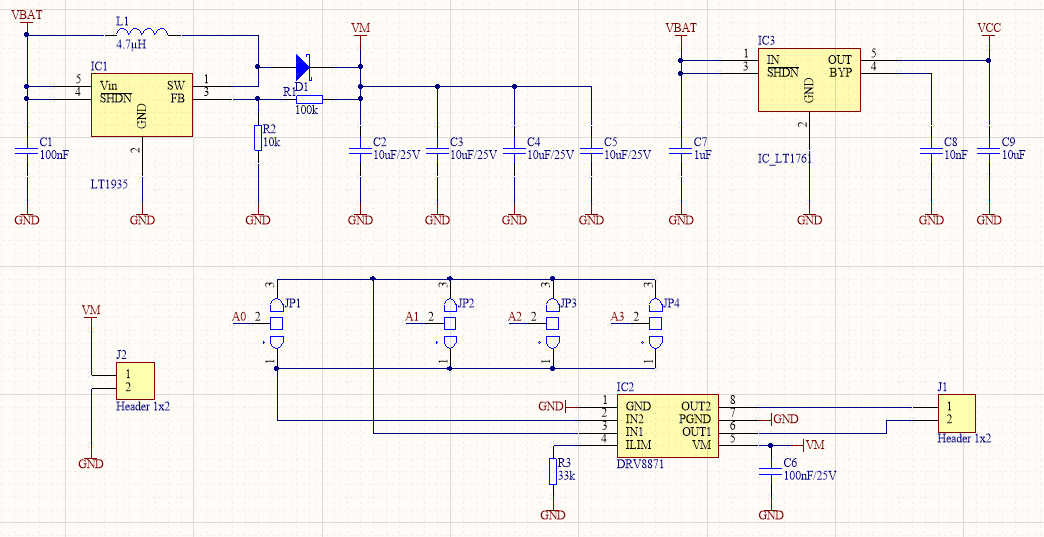
Schematic InverterBeetle
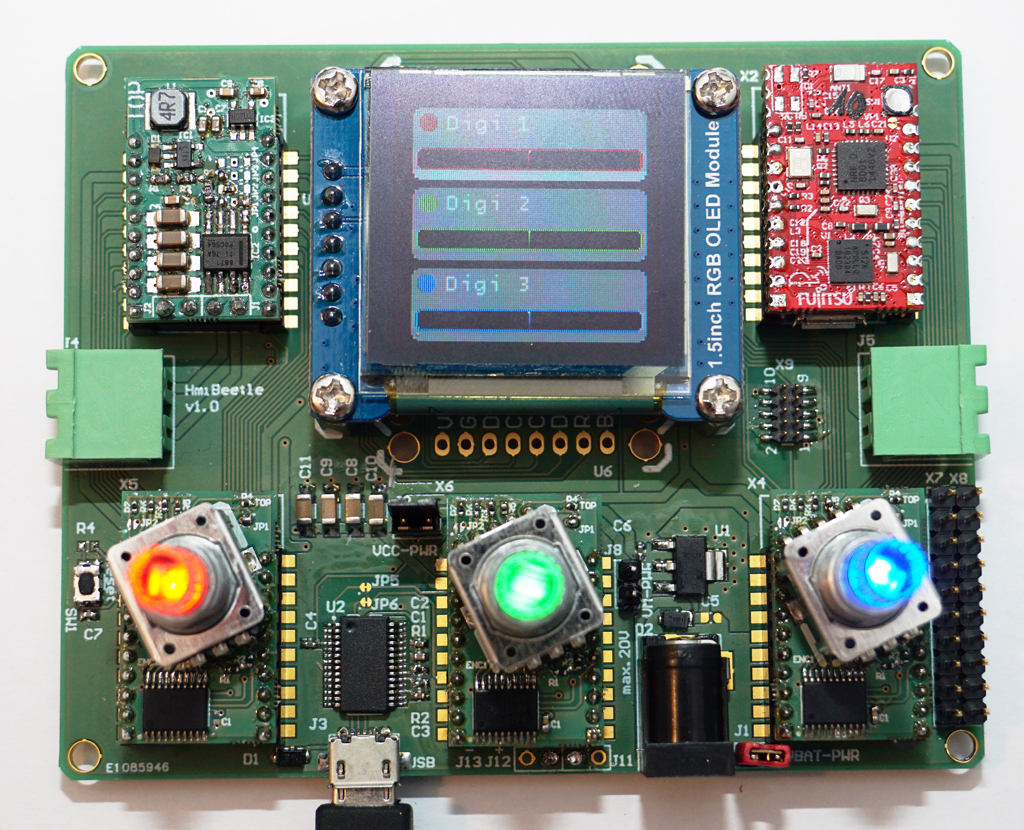
So in summary 3 EncoderBeetles are building the controlling part, one 128×128 pixel RGB OLED display is giving detailed feedback, InverterBeetle is offering a driver stage and BlueBeetle1 adds MCU with BLE.
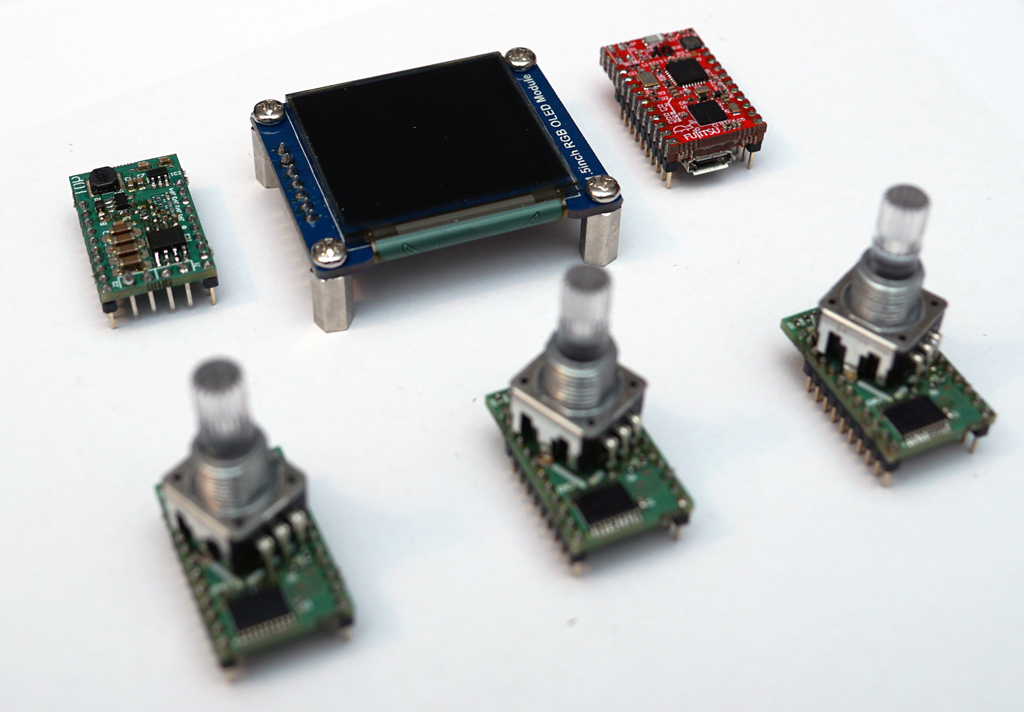
Everything plugged together looks like following result:
Wich fits also into a nice housing.
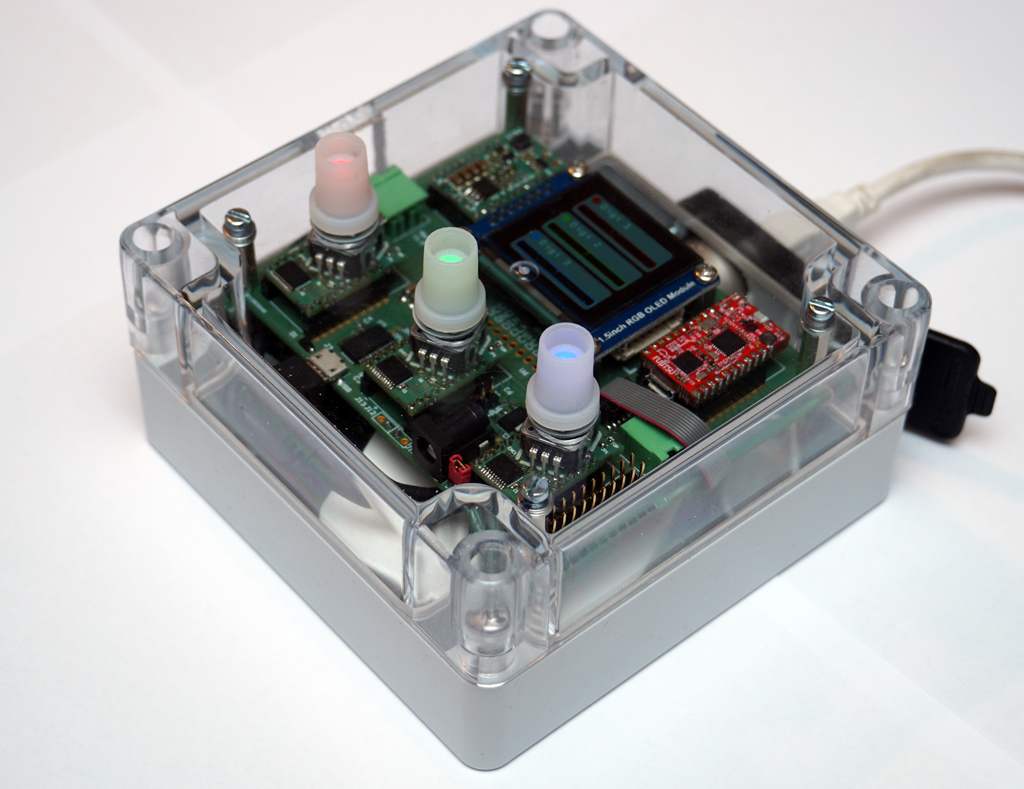
Up to 3 trains can be driven in parallel. For each train one rotary encoder is used. The color gives the signal which rotary encoder is connected to its train. A short press is stopping the train while a 2 second press lets choose the address. If selecting “analog” output, only one rotary encoder is usable.
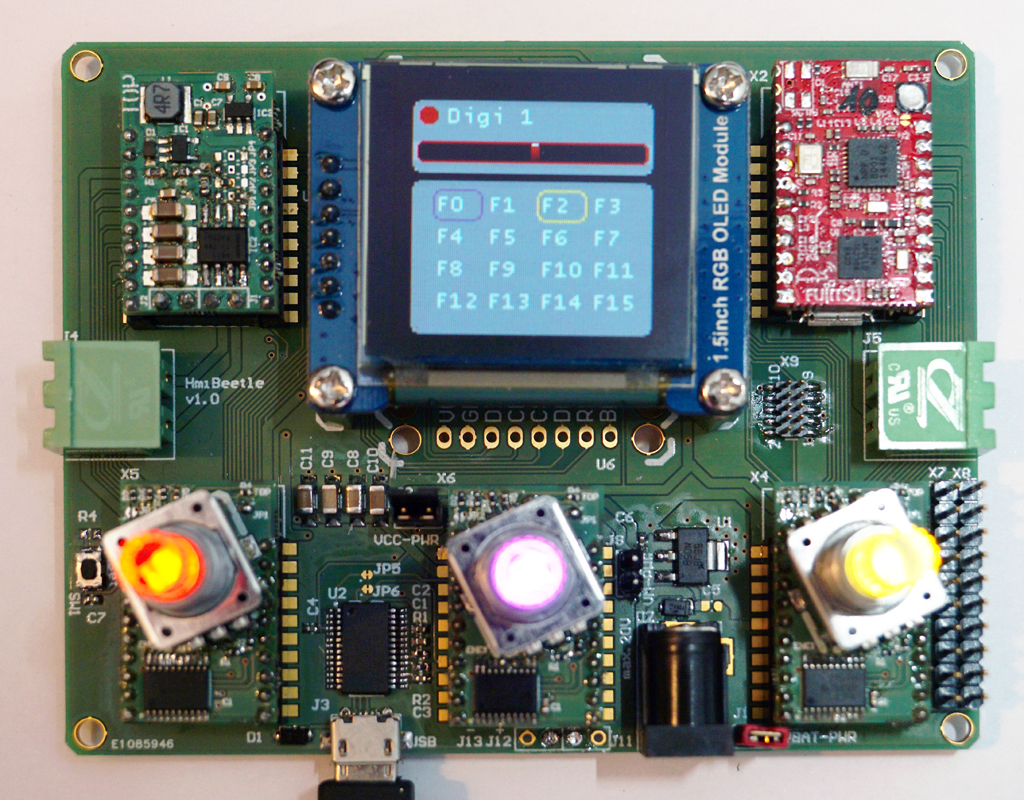
Pressing a rotary switch longer than 5 seconds enters into the drive and functions mode. With the first rotary encoder speed can be controlled while the other two rotary encoders let the possibility to select the function and to execute on button press.
Outlook
It is the plan to offer the complete software and schematics soon.